As an administrator, you can find out what happened to an email message by running a message trace in the Exchange admin center (EAC).
Message trace data is available for the past 90 days. If a message is more than 7 days old, you can only view the results in a downloadable .CSV file.
Run a message trace
-
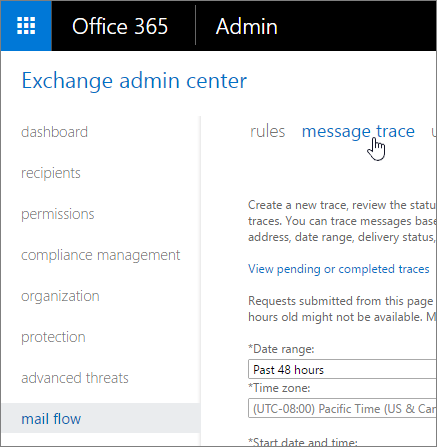
In the EAC, go to Mail flow > message trace.
-
Depending on what you're searching for, you can enter values in the following fields. None of these fields are required for messages that are less than 7 days old. You can simply click Search to retrieve all message trace data over the default time period, which is the past 48 hours.
-
Date range: Using the drop-down list, select to search for messages sent or received within the past 24 hours, 48 hours, or 7 days. You can also select a custom time frame that includes any range within the past 90 days. For custom searches you can also change the time zone, in Coordinated Universal Time (UTC).
-
Delivery status: Using the drop-down list, select the status of the message you want to view information about. Leave the default value of All to cover all statuses. Other possible values are:
-
Delivered: The message was successfully delivered to the intended destination.
-
Failed: The message was not delivered. Either it was attempted and failed or it was not delivered as a result of actions taken by the filtering service. For example, if the message was determined to contain malware.
-
Pending*: Delivery of the message is being attempted or re-attempted.
-
Expanded: The message was sent to a distribution list and was expanded so the members of the list can be viewed individually.
-
Unknown*: The message delivery status is unknown at this time. When the results of the query are listed, the delivery details fields will not contain any information.
*If you're searching for messages that are older than 7 days, you can't select Pending or Unknown.
-
-
Message ID: This is the Internet message ID (also known as the Client ID) found in the message header in the Message-ID: header field. Users can provide you with this information in order to investigate specific messages.
The form of this ID varies depending on the sending mail system. The following is an example: <08f1e0f6806a47b4ac103961109ae6ef@server.domain>.
This ID should be unique; however, not all sending mail systems behave the same way. As a result, there's a possibility that you may get results for multiple messages when querying upon a single Message ID.
Note: Be sure to include the full Message ID string. This may include angle brackets (<>).
-
Sender: You can narrow the search for specific senders by clicking the Add sender button next to the Sender field. In the subsequent dialog box, select one or more senders from your company from the user picker list and then click Add. To add senders who aren't on the list, type their email addresses and click Check names. In this box, wildcards are supported for email addresses in the format: *@contoso.com. When specifying a wildcard, other addresses can't be used. When you're done with your selections, click OK.
-
Recipient: You can narrow the search for specific recipients by clicking the Add recipient button next to the Recipient field. In the subsequent dialog box, select one or more recipients from your company from the user picker list and then click Add. To add recipients who aren't on the list, type their email addresses and click Check names. In this box, wildcards are supported for email addresses in the format: *@contoso.com. When specifying a wildcard, other addresses can't be used. When you're done with your selections, click OK.
-
-
If you're searching for messages that are older than 7 days, configure the following settings: (otherwise you can skip this step):
-
Include message events and routing details with report: We recommend selecting this check box only if you're looking for a small number of messages. Otherwise, the results will take longer to return.
-
Direction: Leave the default All or select Inbound for messages sent to your organization or Outbound for messages sent from your organization.
-
Original client IP address: Specify the IP address of the sender's client.
-
Report title: Specify the unique identifier for this report. This will also be used as the subject line text for the email notification. The default is "Message trace report <day of the week>, <current date> <current time>". For example, "Message trace report Thursday, October 17, 2018 7:21:09 AM".
-
Notification email address: Specify the email address that you want to receive the notification when the message trace completes. This address must reside within your list of accepted domains.
-
-
Click Search: to run the message trace. You'll be warned if you're nearing the threshold of the amount of traces you're allowed to run over a 24 hour period.
After running your message trace, proceed to one of the next sections to read about how to view your results.
Note: To search for a different message, you can click the Clear button and then specify new search criteria.
View message trace results for messages less than 7 days old
After you run a message trace in the EAC, the results will be listed, sorted by date, with the most recent message appearing first.
View report details about a specific message more than 7 days old
When you download and view a message trace report, either from View pending or completed traces in the EAC or from a notification email, its contents depend on whether you have selected the Include message events and routing details with report option.